

There are three great ways to get exploring in your Adelaide Park Lands:
On foot, with one of our Tour Guide leaders in our scheduled Guided Walks;
On screen, with the one or more of the pages listed below; or our Flickr photo album, (we’re sharing thousands of photos there) or our collection of Park Lands videos (one for each of the named/numbered Parks); or
On foot, with our Trail Guides, i.e. self-guided walks.
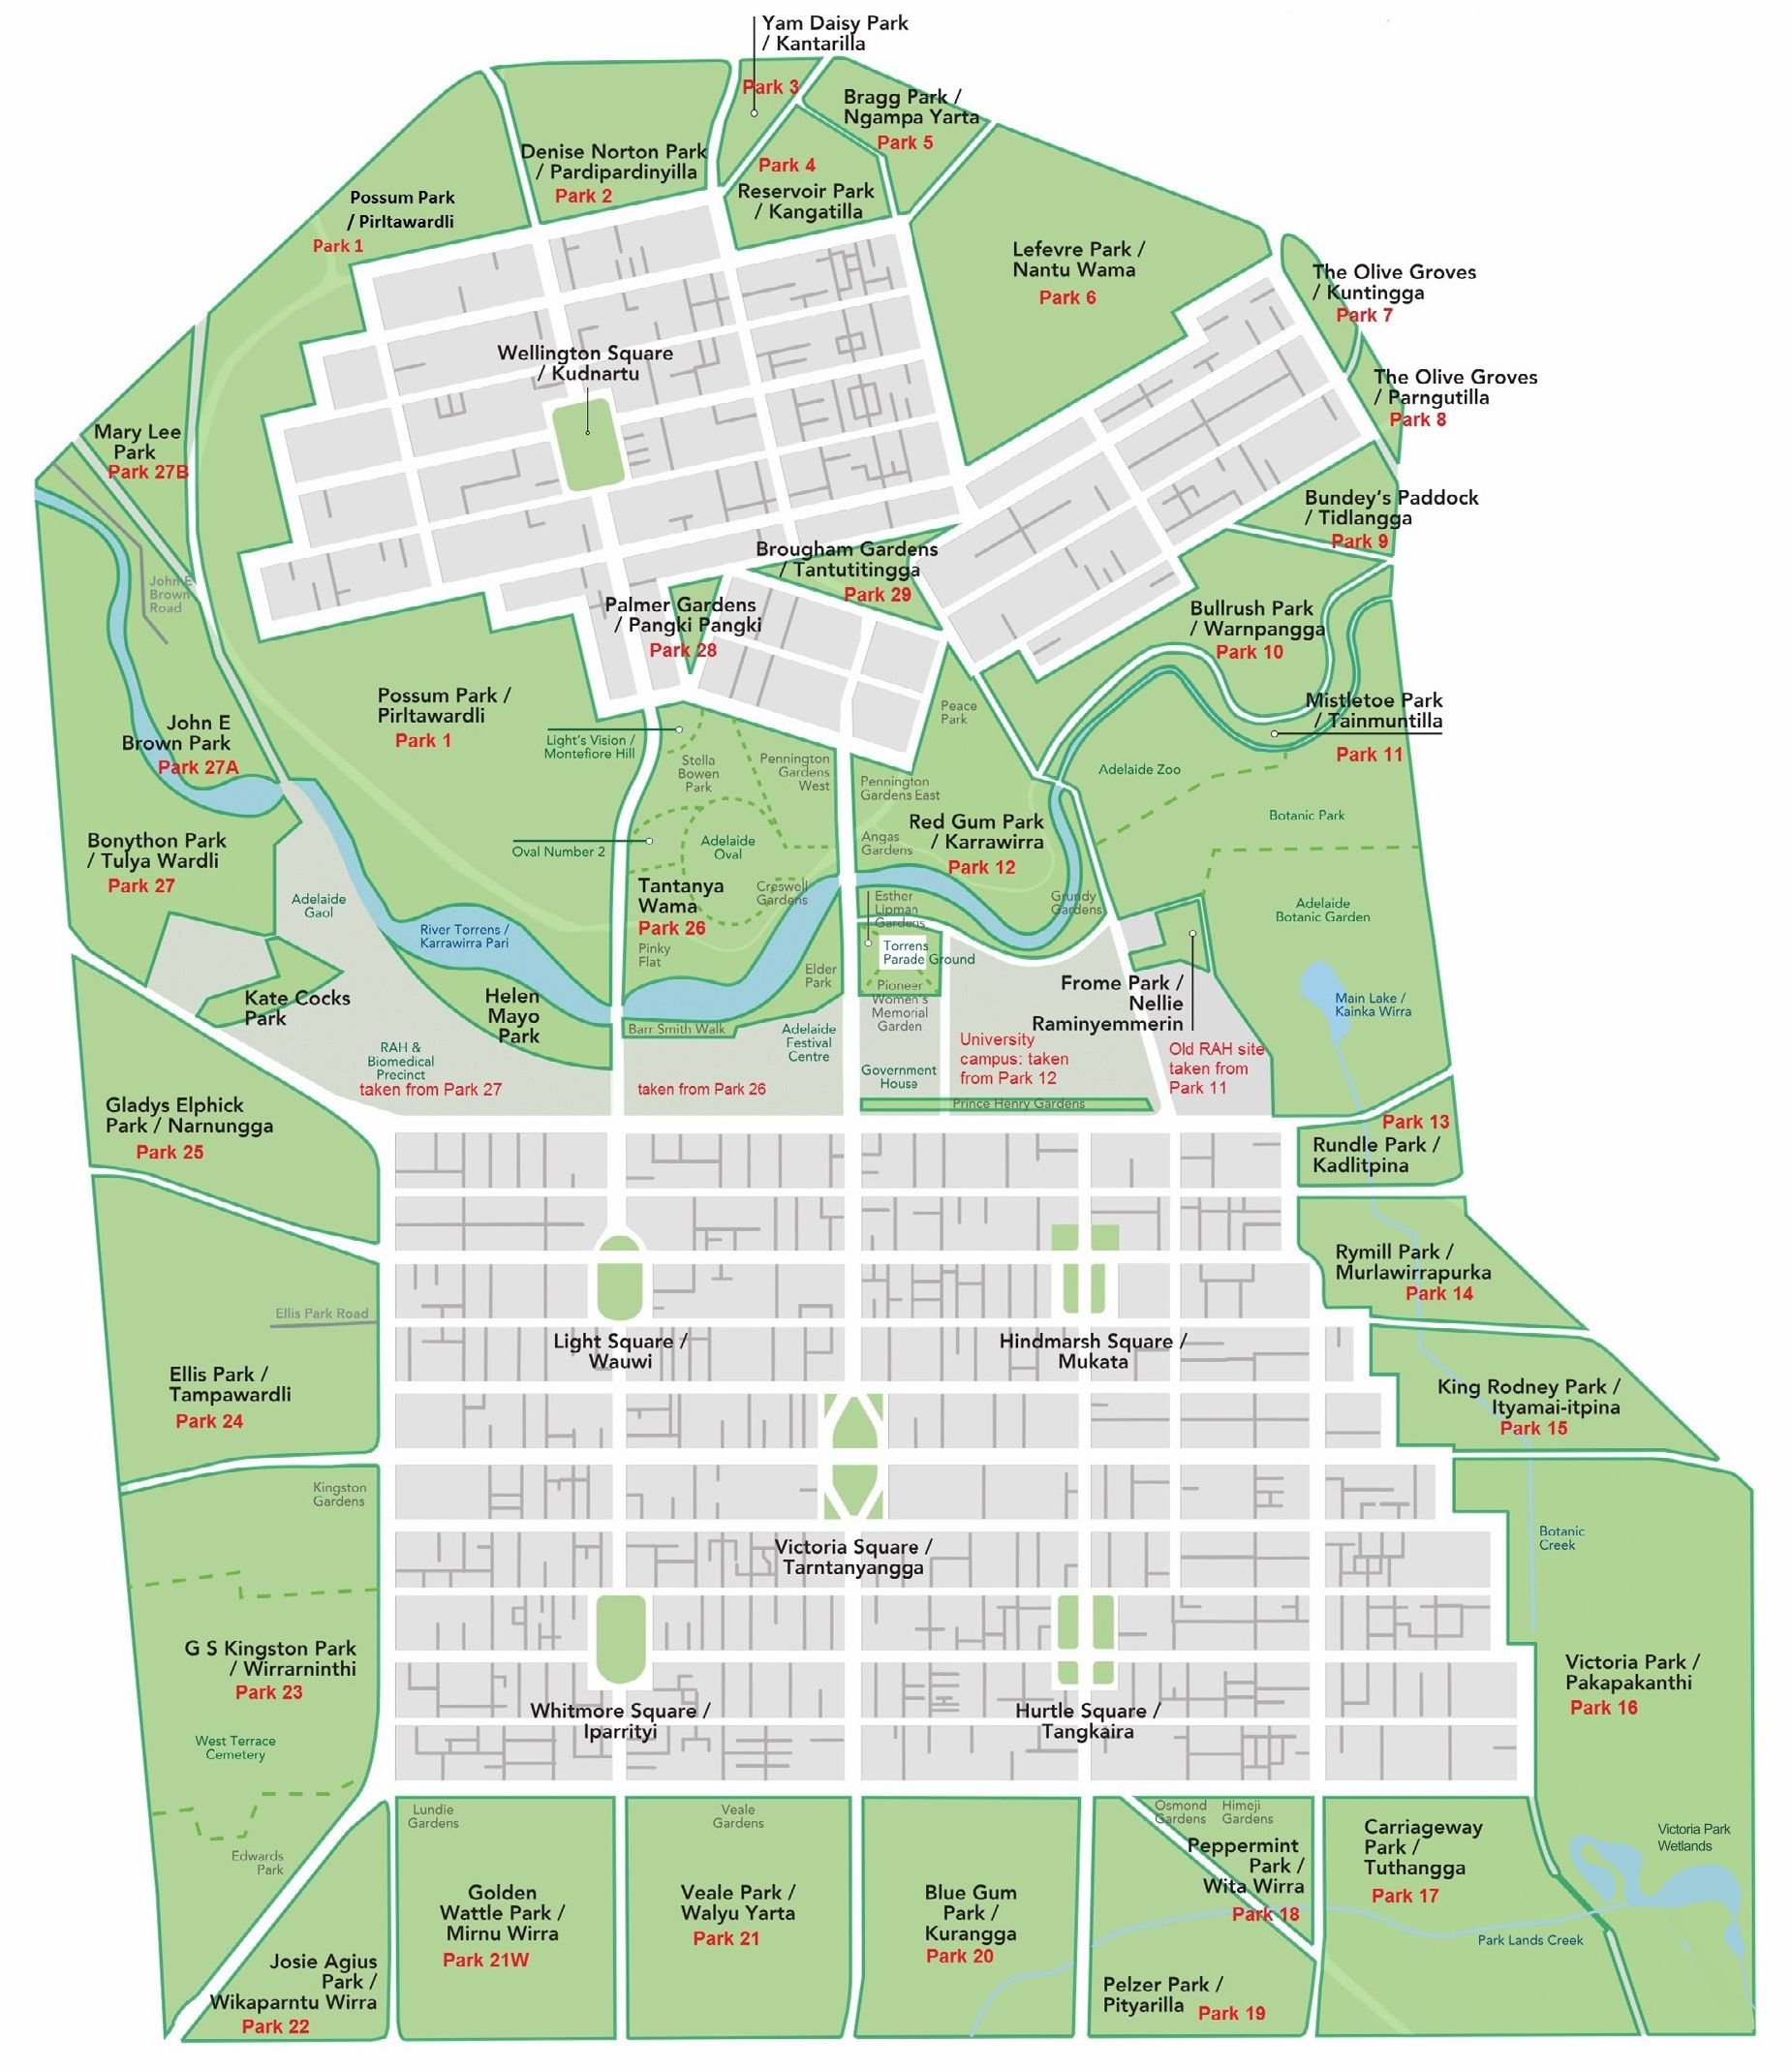
Click on this image to view a single-page A4 map of your Adelaide Park Lands. (PDF 1.36 Mb)
This page is the starting point for exploring your Park Lands. It’s the index to each Park’s own page.
On the Google Map below, you can zoom in or out, and click on any of the blue markers to see and learn more about that part of your Park Lands.
Alternatively, scroll down to find a link to each Park.
Northern Park Lands


Central Park Lands - adjacent to the River Torrens


WESTERN PARK LANDS


GARDENS & SQUARES
Each of the Parks, gardens and squares listed above has its own page on our website, with links to other resources.
Every day, we publish an Adelaide Park Lands 'photo of the day'. The 'photo of the day' is posted every morning on Facebook, Instagram and Flickr. You can contribute by posting your pic on Instagram using the tag #adelaideparklands. We choose some pics to re-post on our feed.
Since 2017, we have produced a video series of each one of the Parks within the Park Lands - from Park #1 through to Park #29. Each of these videos is posted on our YouTube channel, on Facebook, and on the relevant Park's page of this website.
The 'photo of the day' has been running since May 2014, so there are literally thousands of Adelaide Park Lands photos. To browse them, either follow the links above to each Park page, or visit our Flickr photo album where, in addition to the daily photo stream, each photo is assigned to one of 38 'albums' (as above) corresponding to:
each one of the 32 named Parks; and
each of the 6 named squares.

